
Essential Gear for Wildlife Photography – Guide to Wildlife Photography
All of the Essential Gear You Need to Get Started in Wildlife Photography.
As an Amazon Associate, I earn commission from qualifying purchases
Introduction
Wildlife photography is more than just capturing images—it’s about immersing yourself in nature, anticipating the perfect moment, and telling the untamed stories of the wild. But getting started can feel overwhelming. What camera do you need? Is a 600mm lens necessary? What gear is essential, and what can you add later? I’ll answer all of those questions and more in this wildlife photography gear guide.
Whether you dream of photographing majestic bears in the Pacific Northwest, tracking birds in flight, or capturing intimate portraits of elusive creatures, the right gear plays a critical role in your success.
For beginners, stepping into wildlife photography can feel overwhelming. This guide breaks down the must-have equipment, helpful additions, and luxury gear so you can make informed decisions and start capturing breathtaking wildlife images.
What’s your biggest challenge in wildlife photography? Leave a comment below—I’d love to hear from you and help answer any questions you have!
Who Is This Photography Guide For?
- Beginners looking to start wildlife photography with the right gear.
- Hobbyists who already own a camera but want to refine their kit.
- Photographers wanting to upgrade but unsure where to invest first.
Wildlife Camera Gear
Getting started in wildlife photography doesn’t require the most expensive gear, but having the right tools can significantly improve your results. At a bare minimum, you need a camera with fast autofocus, good low-light performance, and a burst mode of at least 5 frames per second, paired with a sharp lens, preferably a telephoto lens (at least 300mm), to get close to subjects without disturbing them. While crop-sensor cameras offer budget-friendly reach, full-frame bodies provide better image quality and low-light performance.
Essential Gear for Wildlife Photography (The Bare Minimum)
If you’re just getting started, you don’t need the most expensive equipment, but having the right tools can significantly improve your results. To take great wildlife photos, you only need:

- Camera Body – A DSLR or mirrorless camera with fast autofocus & burst mode (at least 5 FPS).
- Telephoto Lens – Ideally 300mm or longer for distant subjects.
- Memory Cards – Fast cards to handle burst shooting.
- Camera Batteries – Always carry extras, especially in cold weather.
- Neutral-Colored Clothing – Helps you blend into nature without disturbing wildlife.
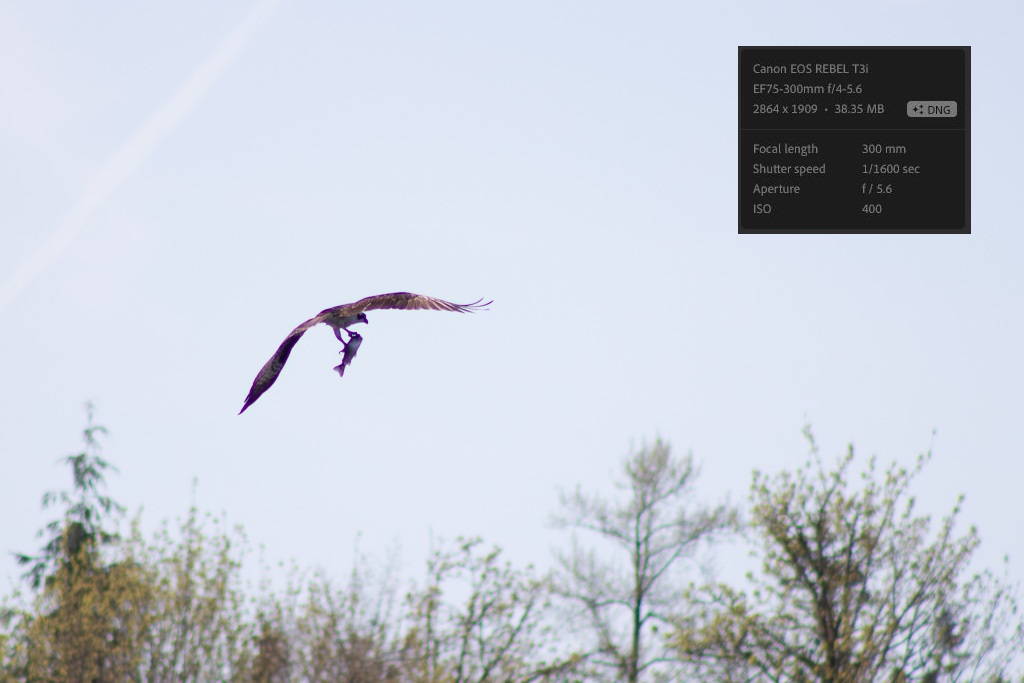
💡 Beginner Tip: You don’t need a 600mm lens or high-end camera body to start! Some of my best early images were taken with an entry-level Canon T3i and an entry-level 75-300mm.
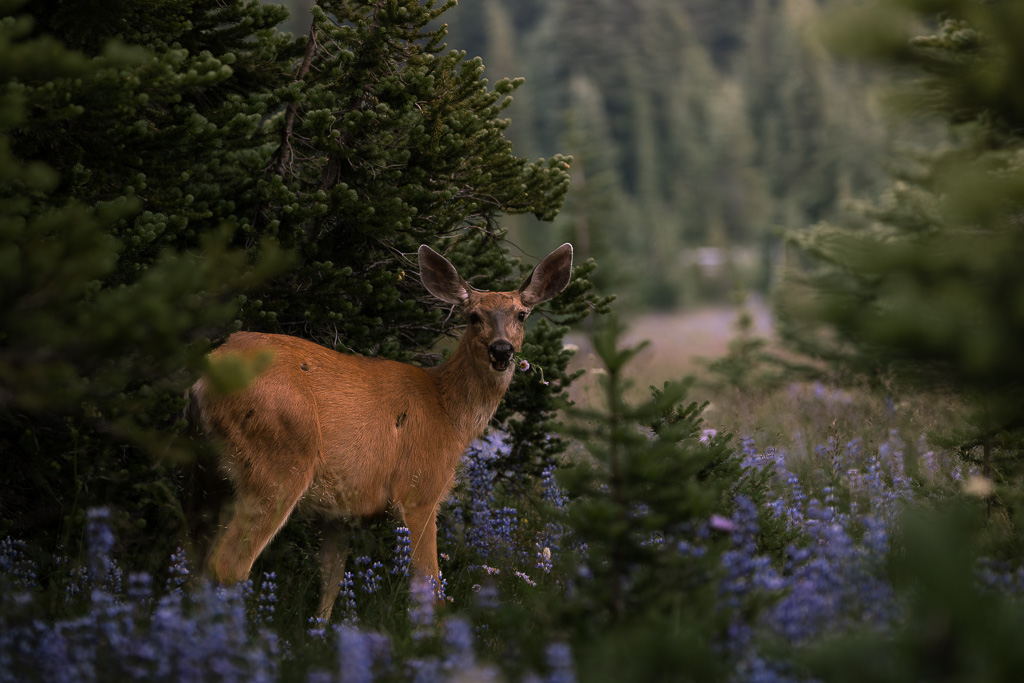
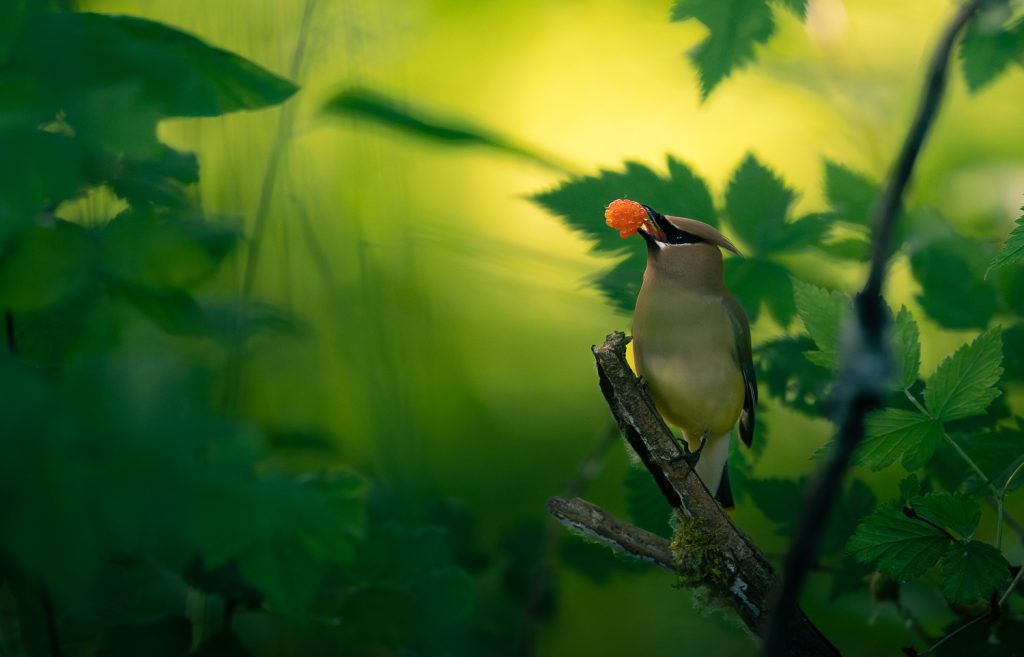
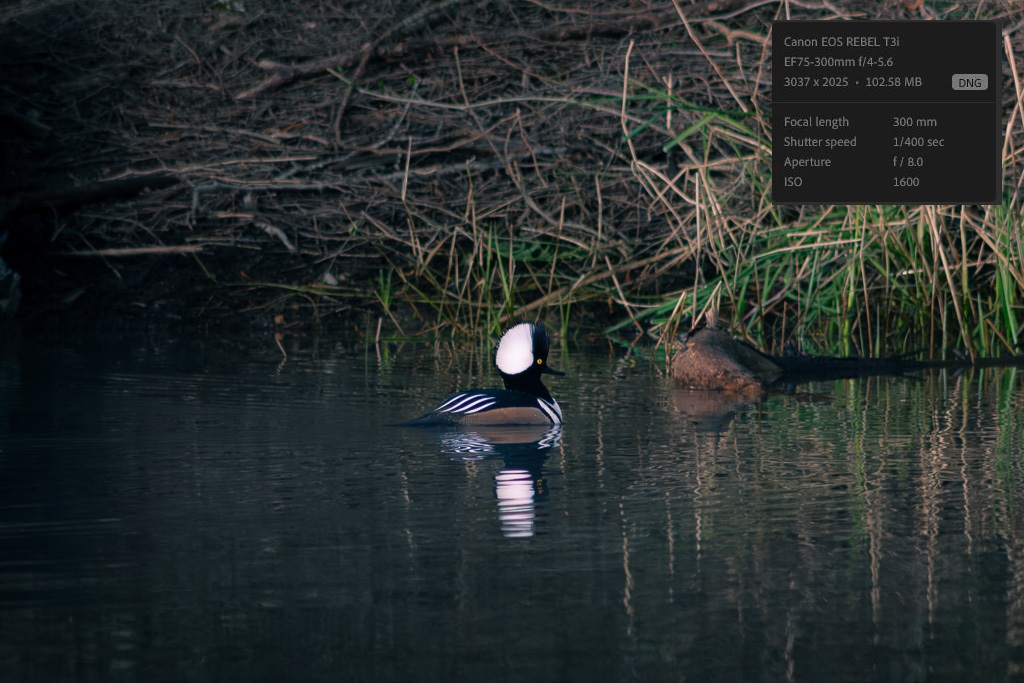
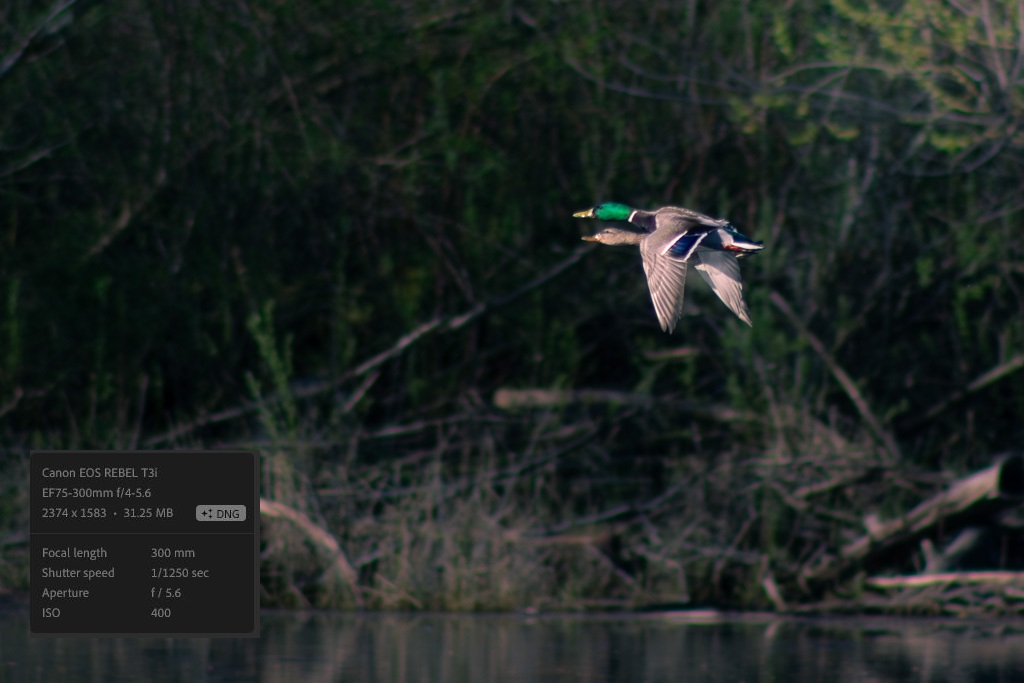
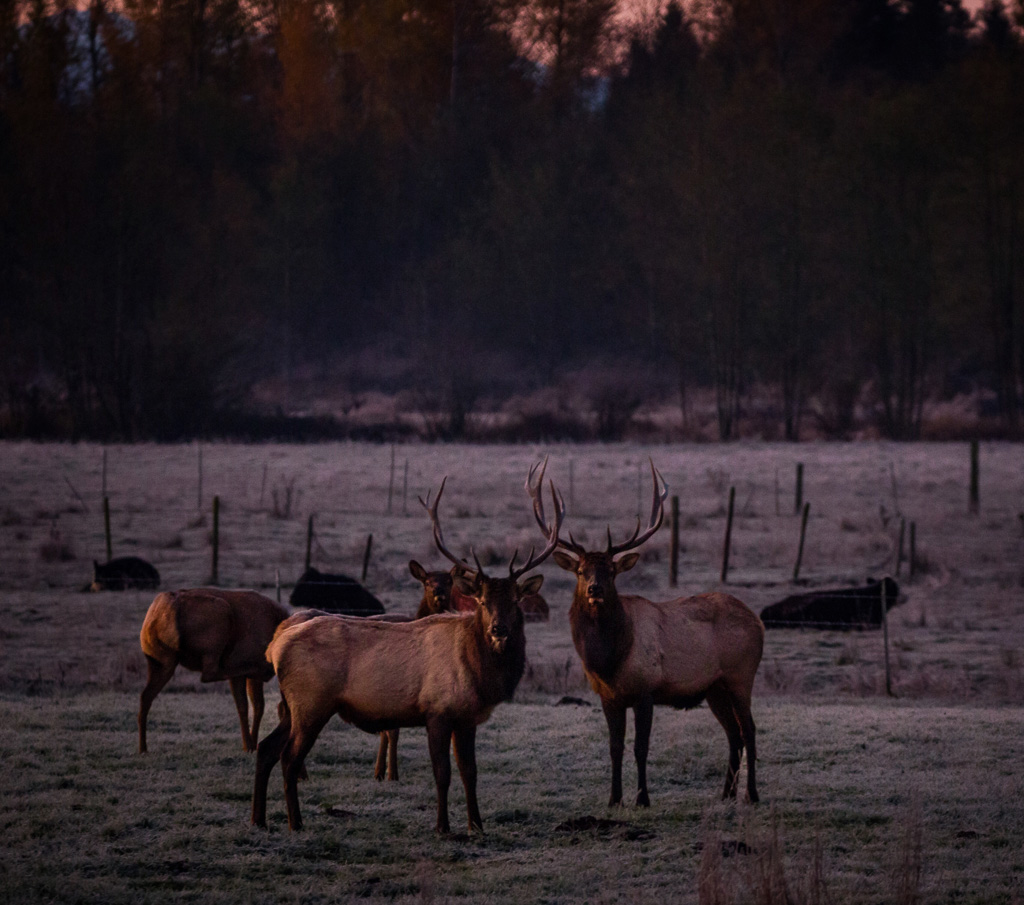
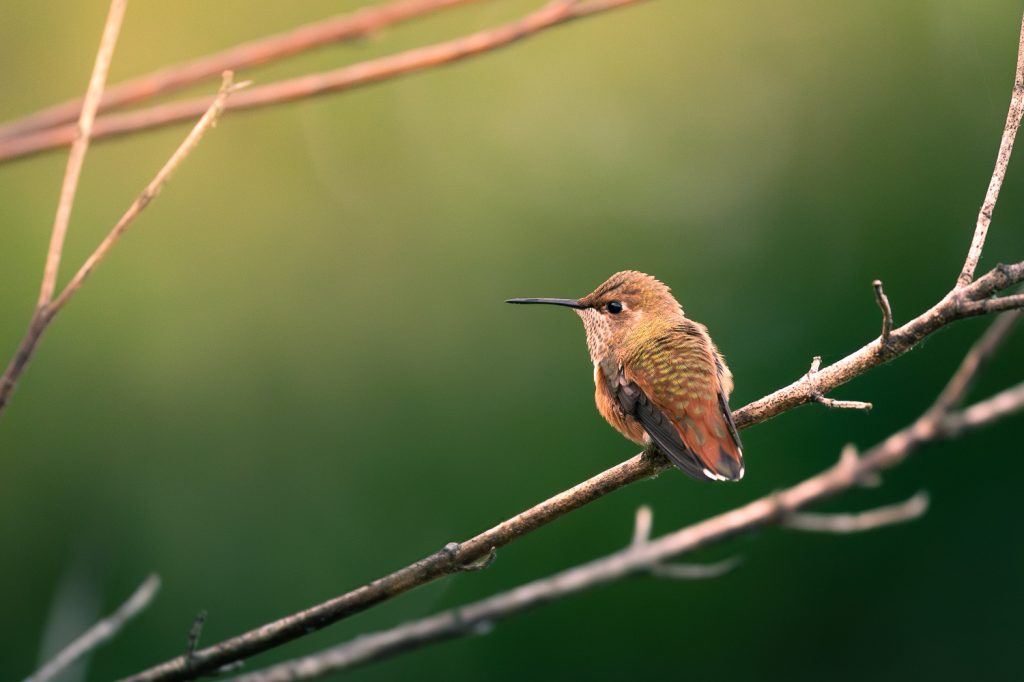
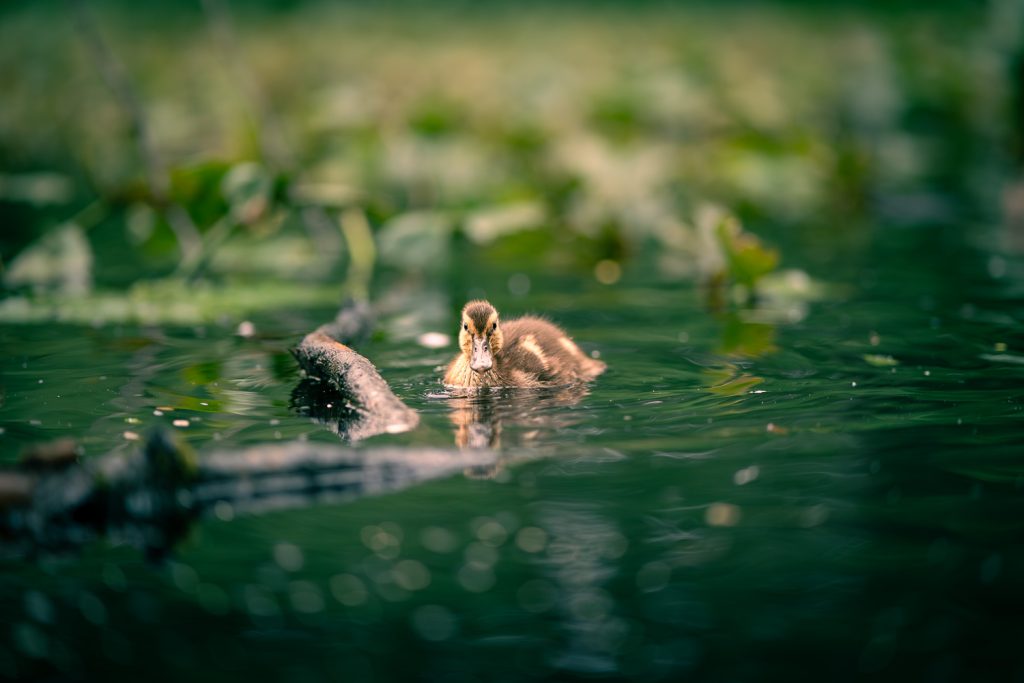
Example Images of Entry-Level Gear
The below images were taken back in 2016 with a Canon T3i and a 75-300mm f4-f5.6 zoom lens. That camera was released in 2011, and the lens can be found for under $200 new. This was entry-level gear 10 years ago, and would get blown out of the water compared entry-level gear available today.
None these images are great shots by any means, but they got me hooked on wildlife photography. They also made me want to get out and practice with the gear I had.
Check out the gear I used for the above shots here on Amazon.
Beyond the basics, there are plenty of nice-to-have additions that can elevate your experience.
A sturdy tripod or monopod helps stabilize long lenses for sharper shots, especially in low light. A weather-sealed camera bags protect your gear in harsh conditions, and camouflage clothing or blinds allow you to blend into your surroundings for more natural animal behavior.
Helpful Additions (Improves Your Experience & Success Rate)
While a camera and lens are the core of wildlife photography, certain accessories can significantly improve your success, comfort, and efficiency in the field. These aren’t required to start, but they will make your time in the field easier and improve your results:
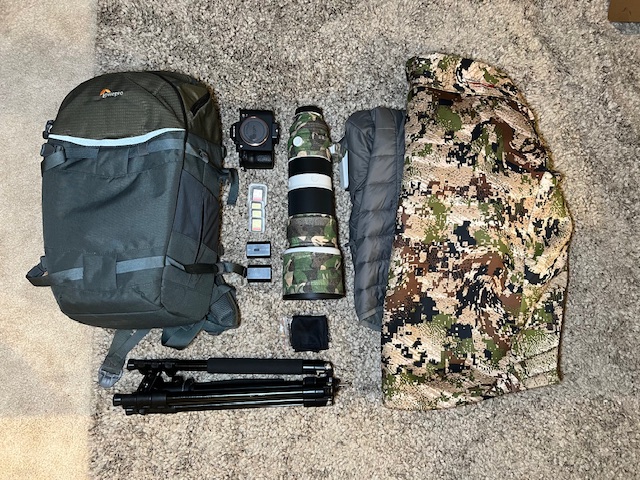
- Tripod or Monopod – Essential for long lenses to reduce camera shake, and helps to ensure sharper images, especially in low light or slow shutter speeds. Reduces fatigue and allows you to stay out in the field longer.
- Weatherproof Camera Bag – Look for one with ample padding, waterproofing, and easy access compartments, especially if you need to swap lenses quickly in the field. Additionally, weatherproof lens covers help protect expensive glass from rain, dust, and extreme temperatures.
- Lens Cleaning Kit – Microfiber cloths, an air blower, and wipes to keep your lens dust-free.
- Extra Memory Cards & Batteries – Prevent missing shots due to storage or power issues. Battery life is degraded in cold weather, having spares may be the difference in a getting the shot and missing it.
- Camouflage & Blinds – Helps you get closer to wildlife without disturbing them. Check out my post – How to build a floating photography blind.
Luxury Gear (Nice-to-Have, but Not Essential at First)
If you plan to pursue wildlife photography seriously, consider these premium investments:
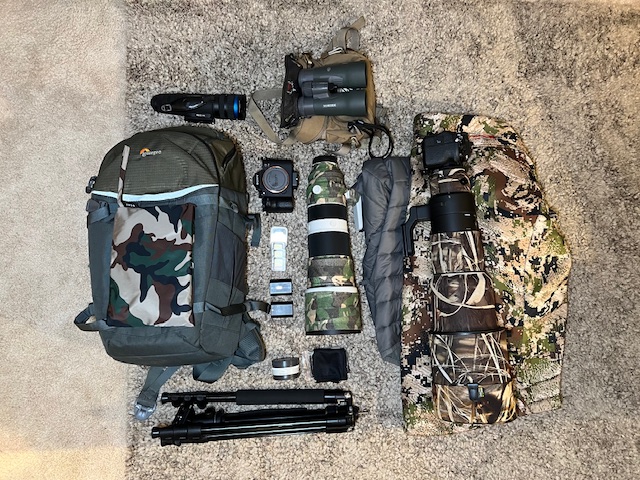
- Teleconverters – Extend the reach of your lens without needing a new one.
- Gimbal Head for Tripod – A tripod with a gimbal head is ideal for tracking moving subjects. In contrast, a traditional head provides a balance between stability and mobility for more active shooting scenarios.
- Prime Lenses (400mm f/2.8, 600mm f/4) – The best for sharpness and low-light performance.
- Lens Covers & Weatherproof Gear – Protects your camera in harsh environments.
- External Flash & Better Beamer – Helps illuminate subjects in low light or fill shadows.
- Binoculars or Spotting Scope—Telephoto lenses are nice for getting close-up detailed shots, but most of the time, locating and identifying the species you are targeting is half the battle. Quality glass can make all the difference.
- Extra Camera Body & Lenses — Two separate setups can be the difference between capturing the shot or missing it while changing lenses.
- Thermal Optics — Many wildlife species survive by being cautious, silent, and camouflaged. Thermal imaging can give you a leg up on locating wildlife in the field. Check out my article on thermal scanners and Wildlife photography.
While gear plays an important role, mastering technique and understanding wildlife behavior are the keys to capturing incredible images. Check out my post—Essential Guide to Wildlife Photographers.
Choosing the Right Camera Body
A camera body is an essential piece of gear for wildlife photography. So, how do you determine which camera is right for you? Selecting the right camera body for wildlife photography comes down to sensor type, shooting speed, autofocus, and low-light performance. All are crucial factors in capturing sharp, detailed images of fast-moving animals. The two primary sensor options are crop sensor (APS-C) and full-frame cameras, each with its own advantages and trade-offs.
Crop Sensor (Best for Beginners & Budget-Friendly)
Crop sensor cameras have a smaller sensor size, which effectively increases the focal length of your lens due to the crop factor (e.g., a 300mm lens on a 1.5x crop-sensor acts like a 450mm lens). This extra reach is beneficial for wildlife photography, as it allows you to get closer to distant subjects without investing in ultra-expensive super-telephoto lenses.
Crop sensor bodies also tend to be more affordable and lighter, making them great for beginners or those needing a more portable setup. However, they generally have smaller pixels, meaning they don’t perform as well in low-light conditions and may produce more noise at higher ISOs. With the advances in post-processing and AI denoise software such as Topaz and Lightroom, I would argue that noise is much less of an issue than it used to be and should not be the most significant factor in making your selection.
Crop Sensor Pros and Cons
Pros:
- More reach with telephoto lenses due to crop factor (e.g., 300mm becomes 450mm).
- Affordable and lightweight, great for travel and handheld shooting.
Cons:
- More noise at high ISOs, not as strong in low light.
Full Frame (Best for Professionals & Low-Light)
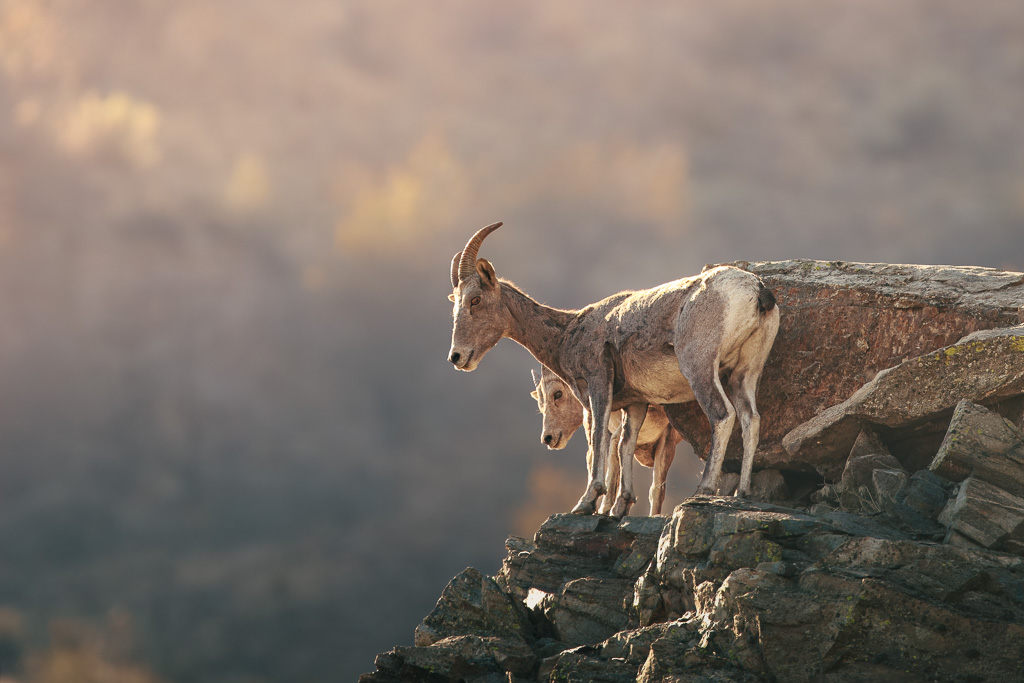
On the other hand, full-frame cameras provide superior image quality, better dynamic range, and stronger low-light performance, making them ideal for early-morning or twilight wildlife photography. Their larger sensor captures more detail and less noise at high ISO settings, which is crucial when shooting in dense forests or during golden hour when light levels drop.
The downside is that full-frame bodies are heavier and more expensive and lack the built-in crop factor advantage for extra reach. This means you may need longer (and pricier) lenses to achieve the same framing as a crop sensor.
Full Frame Pros and Cons
Pros:
- Superior image quality, better dynamic range, stronger low-light performance.
- Ideal for dawn & dusk shooting when wildlife is most active.
Cons:
- More expensive
- Heavier and requires longer (costlier) lenses for reach.
Regardless of sensor type, a good wildlife camera should have fast, continuous shooting speed (at least 8–10 frames per second) to capture action shots, as animals move unpredictably. A camera with reliable autofocus tracking and a high buffer capacity allows you to quickly take multiple shots without slowing down. Low-light performance is also important; as mentioned earlier, wildlife is most active at dawn and dusk, so choosing a camera with strong high-ISO capabilities will help you shoot in dim conditions without excessive noise.
Ultimately, both crop-sensor and full-frame cameras can produce incredible wildlife images. Beginners might find crop-sensor models a cost-effective, practical choice. Experienced photographers may prefer full-frame bodies for their superior image quality and low-light abilities. The best option depends on your budget, shooting style, and the type of wildlife photography you plan to pursue.
💡 Example Wildlife Camera Recommendations (Links to Amazon):
- Budget Crop Sensor:
- Canon R7
- Sony A6700
- Mid-Range Full Frame:
- Sony A7 IV
- Canon R6
- High-End Full Frame:
- Nikon Z9
- Sony A1 II
Selecting Lenses for Wildlife Photography
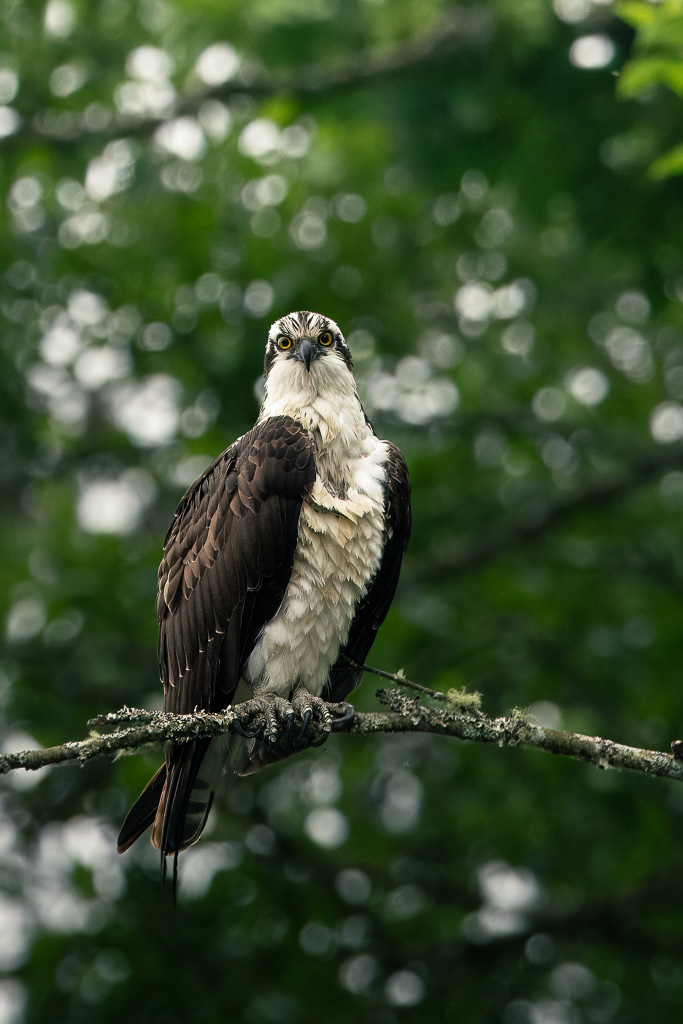
Choosing the right lens for wildlife photography is your most important purchase, even more important than selecting the right camera body. I would much rather have a fantastic lens on a mediocre camera body than a flagship camera body with an okay lens. The above Osprey shot was taken on a very inexpensive entry-level crop sensor body, but with a decent mid range lens. Check out the lens used on Amazon.
Wildlife subjects are often distant, fast-moving, and unpredictable, making telephoto and zoom lenses the go-to tools for wildlife photographers in most situations. However, wide-angle and prime lenses also have their place, depending on your shooting style and environment.
Lens Considerations
Your lens matters more than your camera body in wildlife photography. The lenses you use will make the biggest impact on the quality of images you capture. Camera body technology rapidly changes, and cameras lose their value. My recommendation for anyone selecting their essential gear for wildlife photography is to purchase the most premium glass that they can. Quality lenses hold their value extremely well over time.
Zoom Lenses (100-400mm, 200-600mm): More versatile and great for beginners.
Prime Lenses (400mm f/2.8, 600mm f/4): Sharper & faster autofocus but expensive and heavy.
💡 Beginner Tip: A budget-friendly 100-400mm or 200-600mm is a great starting lens before investing in premium glass.
Lens Selection Tips
- Small birds? → You’ll need 400mm minimum, ideally 600mm or more.
- Larger mammals or Animals Used to Humans? → A 200-400mm lens works well in national parks, local duck ponds, and Wildlife Refuges.
- Environmental shots? → A 35mm or 50mm lens captures wildlife within landscapes.
Telephoto vs. Wide-Angle Lenses
- Telephoto lenses (e.g., 300mm, 400mm, 600mm) allow you to zoom in on distant subjects without disturbing them, making them ideal for bird photography, large mammals, and skittish wildlife.
- Wide-angle lenses (e.g., 14mm, 24mm, 35mm) are less common in wildlife photography. Still, they can be incredibly useful for capturing animals within their environment, creating a sense of scale and storytelling. A 35mm lens, for example, can be used for close-up wildlife encounters where you want to incorporate the surroundings into the composition while benefiting from handheld flexibility and excellent light transmission.
Zoom vs. Prime Lenses
- Zoom lenses (e.g., 100-400mm, 200-600mm) offer versatility by allowing you to adjust focal length without physically moving. However, as zoom range increases, light transmission decreases, meaning that zoom lenses often have smaller maximum apertures (e.g., f/5.6 or f/6.3) compared to primes. This can make them less effective in low-light conditions and requires careful camera settings to avoid motion blur.
- Prime lenses (e.g., 400mm f/2.8, 600mm f/4) provide exceptional sharpness, faster autofocus, and wider maximum apertures, allowing for superior subject isolation and better low-light performance. However, they are heavier, more expensive, and require you to physically reposition yourself to adjust the framing.
Handling Large Telephoto Lenses & Stability Considerations
Using a long telephoto lens isn’t just about zooming in—it requires careful technique to maintain sharpness. As focal length increases, even the slightest vibrations become more noticeable, requiring the use of tripods, monopods, or image stabilization (VR/IS/IBIS) systems. The longer the lens, the more critical it is to have a good hand-holding technique or support gear to prevent camera shaking. Additionally, internal vs. external zooming mechanisms impact usability—internal zooms maintain their balance and weather sealing, whereas external zooms extend outward, making them more susceptible to dust and moisture.
Autofocus Speed, Weight, and Cost
- Autofocus speed and accuracy vary significantly between lenses, with professional prime lenses (like the 400mm f/2.8 or 600mm f/4) having faster, more precise autofocus motors than budget zooms. This can be the difference between capturing a perfectly sharp bird in flight or missing the shot entirely.
- Weight is a significant consideration for wildlife photographers, especially when trekking into remote locations. Large primes can weigh over 6 lbs (3 kg), making them impractical for handheld shooting over long periods. Lighter zooms like the 100-400mm or 200-600mm offer a balance between reach and portability.
- Premier wildlife lenses are expensive, with top-tier primes like the 600mm f/4 and 400mm f/2.8 costing upwards of $10,000–$14,000, making them a serious investment for professionals. More affordable alternatives include third-party zoom lenses (e.g., Sigma & Tamron 150-600mm) or slower super-telephoto options like Nikon’s 800mm f/6.3 PF for budget-conscious photographers.
While the right lens is crucial, technique matters just as much—understanding how to stabilize, expose correctly, and track your subject will maximize your lens’s potential, regardless of its price or specifications.
Lens considerations
When choosing the right lens for wildlife shots, it’s essential to determine what you’ll be using it for most and to ensure that it is comfortable in your hands. Are you primarily photographing small songbirds? A minimum of 400mm is often necessary, while 600mm or even 800mm is preferred for capturing fine details from a distance. If your focus is on larger animals or species accustomed to human presence, you can often get away with shorter focal lengths (200-400mm), especially in national parks or reserves where wildlife is more approachable.
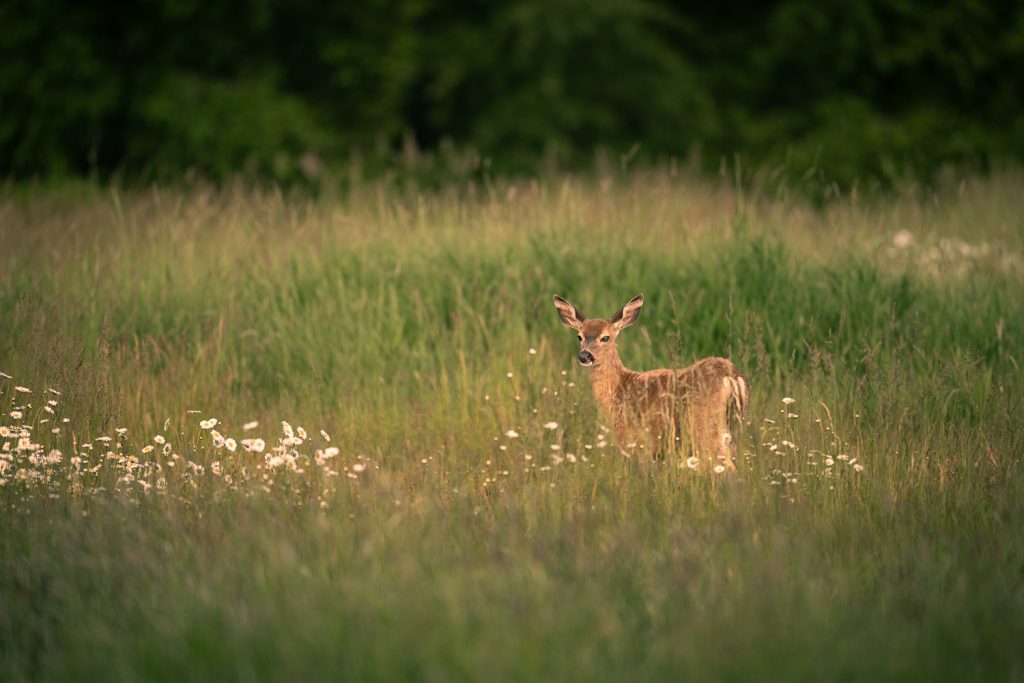
Beyond focal length, consider the style of images you want to create. Do you like tight wildlife portraits that fill the frame with intricate feather or fur details? Or are you drawn to environmental wildlife photography, where the subject is placed within a stunning landscape—such as a deer in a foggy meadow or an elk framed against sunlit, snow-capped mountains? Identifying the type of images you aspire to capture will help guide your lens selection and ensures you will be equipped with the proper essential gear for wildlife photography
As you grow in your photography journey, you’ll likely add multiple lenses to your kit, allowing you to adapt to different shooting conditions and subjects in the field. While no single lens is perfect for all situations, understanding your needs and creative vision will help you invest in the best lens for your goals.
Quick Start Guide: Essential Gear for Starting Wildlife Photography Today
🔹 Budget Option: Crop-sensor camera + 100-400mm lens. 🔹 Mid-Range: Sony A7 IV + 200-600mm lens. 🔹 Essentials: Extra batteries, memory cards, a tripod/monopod, and neutral clothing. 🔹 Practice: Start in local parks, use burst mode, and track moving subjects.
Final Thoughts
Wildlife photography is a journey, not a race. Start with what you can afford, master your gear, and build your kit over time. The best photos don’t come from expensive equipment but from knowledge, patience, and time spent in the field. Keep practicing, keep learning, and most importantly—enjoy the experience! If you have found the article Essential Gear for Wildlife Photography helpful, I would love to hear from you in a comment below!
What’s the #1 piece of wildlife photography equipment you’re considering for wildlife photography? Drop a comment below!
Leave a Reply